This post may contain references to products from one or more of our advertisers. Oh Sweet Basil may receive compensation when you click on links to such products.
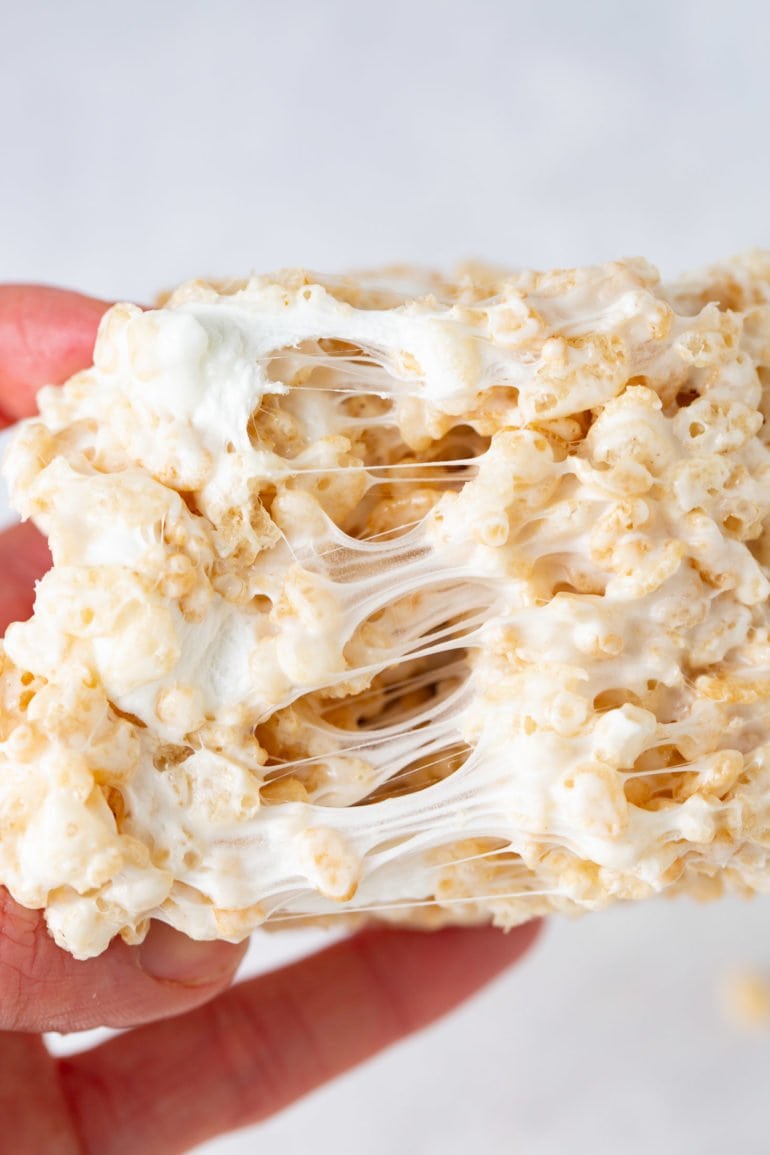
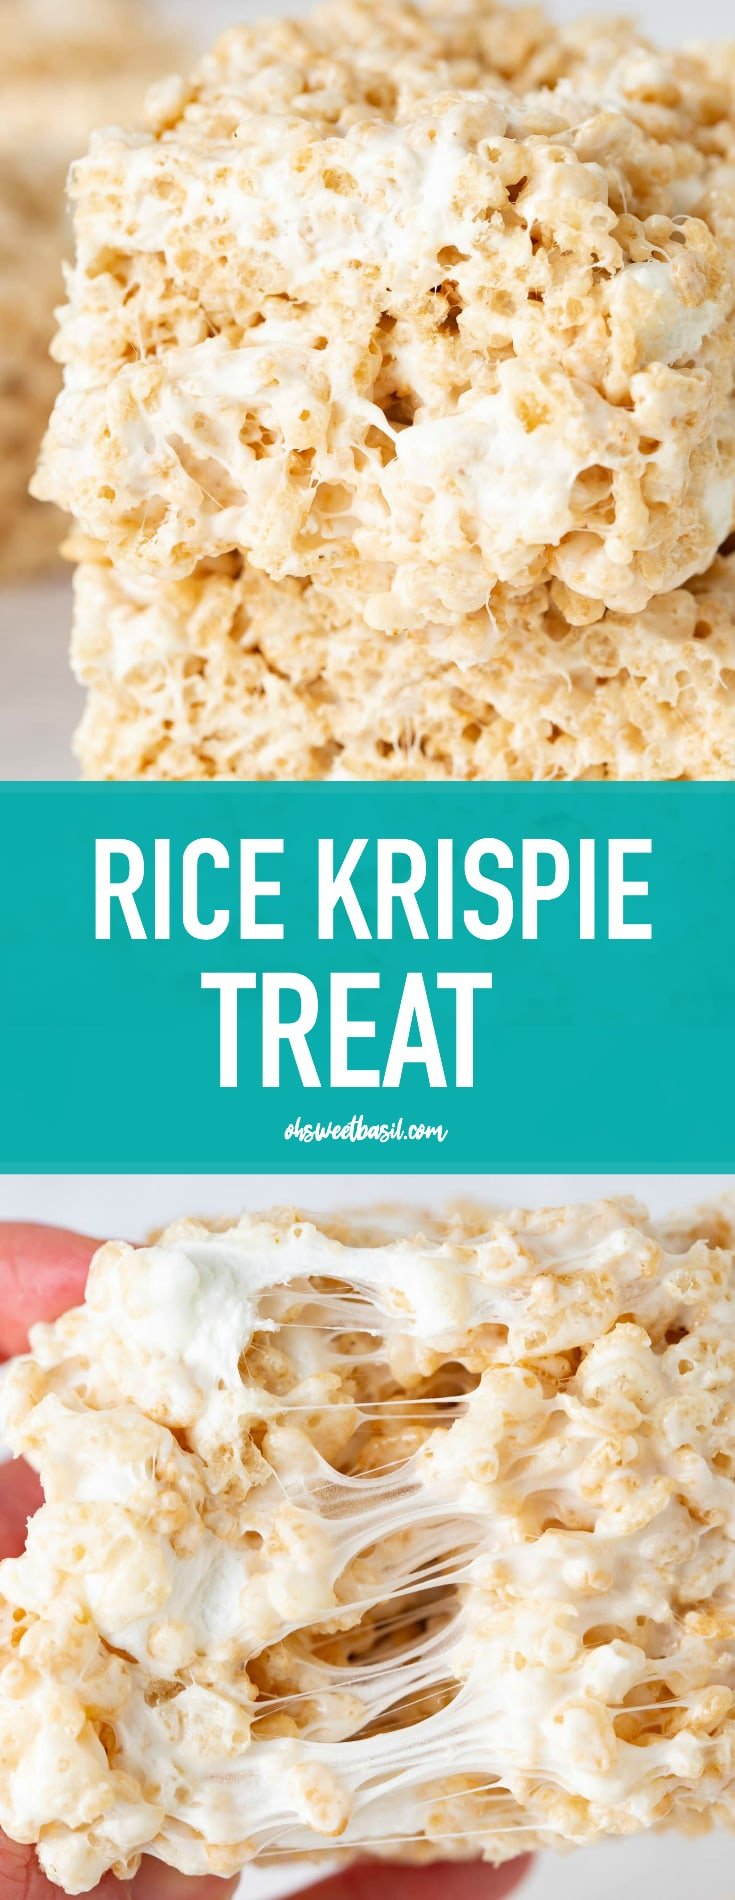
These homemade Rice Krispie Treats are big, fluffy, and ridiculously gooey thanks to our marshmallow-loaded secret. Quick to make, no oven needed, and perfect for parties, dessert trays, or a random Tuesday. With just a few pantry ingredients, the flavor blows the classic rice crispies recipe out of the water.

Table of Contents
- Ingredients for Rice Krispie Treats
- How to Make Rice Krispie Treats
- Can I Use Regular Marshmallows Instead of Mini?
- Why are My Rice Krispie Treats Hard?
- Can I Add Peanut Butter to These?
- What Size Pan Should I Use if I Want Thinner or Thicker Treats?
- Rice Krispie Treat Variations to Try
- Tips for the Best Rice Krispie Treats
- Storing and Freezing Rice Krispie Treats
- More Rice Krispie Treat Recipes:
- Rice Krispie Treats Recipe
These rice krispie treats are everything you love about the classics, but leveled up with extra marshmallows, a buttery melt, and just the right pinch of salt. The texture is soft and chewy with pops of gooey mini marshmallows in every bite – pure magic. We’ve made batch after batch in our kitchen, testing the cereal-to-marshmallow ratio until it was just right. The flavor is rich, nostalgic, and just sweet enough to make you reach for seconds… or thirds!
There’s just something about simple, old-school treats that never goes out of style – especially when they’re this good. The sweet, buttery aroma wraps the whole kitchen in a warm hug, and that soft, stretchy marshmallow pull when you lift one out of the pan is downright irresistible. To round out your dessert table with more no-fuss favorites, try our Chewy M&M Chocolate Chip Cookies or the ultra-rich No-Bake Chocolate Peanut Butter Cookies.
Ingredients for Rice Krispie Treats
Every ingredient in this recipe is working overtime to make your treats extra gooey, extra flavorful, and completely drool-worthy. So let’s give them the spotlight they deserve.
- Unsalted Butter: The base of that rich, buttery flavor that soaks into every bite. Salted butter works in a pinch, just cut back the sea salt slightly.
- Sea Salt, Fine Grain: A little goes a long way to balance all that sweetness. Don’t skip it, and definitely don’t swap in table salt.
- Mini Marshmallows: The magic glue of all things gooey. We melt 8 cups and stir in another 2 for those dreamy pockets of fluff. No big marshmallows here, please.
- Vanilla Extract: Adds depth and brings out that warm, sweet flavor we all love. Don’t leave it out unless you’re out of vanilla and desperate.
- Rice Krispies Cereal: The crisp, crunchy backbone of these treats. You can use store-brand crispy rice cereal, but Kellogg’s Rice Krispies give that OG snap, crackle, pop we’re going for.
The measurements needed for each ingredient can be found in the recipe card at the end of the post.
How to Make Rice Krispie Treats
These gooey, chewy, marshmallow-packed treats come together faster than your kids can yell “Can I have one?” Let’s break it down step by step.
- Prep your pan. Spray a 9×9-inch dish with non-stick cooking spray, then line it with foil, wax paper, or parchment paper for easy lift-out. Spray again to keep things from sticking.
- Tip: A parchment sling is your best friend for pulling the whole thing out cleanly.
- Melt the butter and marshmallows. In a large pot or a big microwave-safe bowl, add the butter, sea salt, and 8 cups of mini marshmallows. Melt everything on medium heat, or in the microwave in 30-second bursts, stirring between each until totally smooth.
- Tip: Don’t overheat or the sugar in the marshmallows can get tough – low and slow is the way to go!
- Stir in the vanilla. Once everything’s melted and glossy, remove from heat and quickly stir in the vanilla extract.
- Mix in the cereal. Add your Rice Krispies cereal to the melted mixture and stir gently but quickly until it’s all evenly coated. A rubber spatula or buttered spoon makes this part way easier.
- Add the extra marshmallows. While the mixture is still warm, stir in the remaining 2 cups of mini marshmallows. These little pockets of unmelted fluff give that signature gooey stretch we all love.
- Press into the pan. Pour the mix into your prepared pan and gently press it down into an even layer. Don’t press too hard – you want them fluffy, not compact bricks!
- Tip: Lightly butter your hands or spatula, or run your fingers under water to prevent sticking.
- Finish with flaked sea salt. While still warm, sprinkle flaked sea salt on top for that perfect sweet-salty bite that makes the buttery vanilla flavor pop!
All of these steps can also be found in the recipe card at the end of this post.
Can I Use Regular Marshmallows Instead of Mini?
You can, but mini marshmallows melt more evenly and quickly, which gives you that silky, smooth mixture. If you’re using regular-sized marshmallows, just be sure to chop them up a bit or give them a little extra time to melt down completely.

Why are My Rice Krispie Treats Hard?
This usually happens when the butter and marshmallows get too hot. Overheating causes the sugars to firm up too much, turning your soft, chewy dessert into something that could chip a tooth. Keep the heat low and slow, and don’t press the mixture too firmly into the pan.
Can I Add Peanut Butter to These?
Yes, and it’s delicious! Stir a half cup of creamy peanut butter into the melted butter and marshmallow mixture before adding the cereal. It adds a nutty flavor and a bit of protein – because balance, right?
What Size Pan Should I Use if I Want Thinner or Thicker Treats?
A 9×9-inch dish makes thick, bakery-style bars, while a 9×13-inch pan will give you thinner squares that stretch further (great for sharing… or pretending to). Just adjust how much you press the mixture based on your pan size and desired thickness.
Tip: You can also double this recipe into a 9×13-inch pan for even more thick and chewy treats to share.
Rice Krispie Treat Variations to Try
You’re welcome to experiment with other cereals when making these homemade rice krispie treats. A few rice krispie treat variations you can try include:
- Swap in cocoa-flavored crispy rice cereal like Cocoa Pebbles for a chocolatey twist that kids (and chocolate-loving adults) will go wild for.
- Stir in a handful of white chocolate chips with the cereal while the mixture is still warm for creamy little pockets of sweetness.
- Try fruity cereal like Fruity Pebbles or Fruit Loops for a colorful, candy-like version that’s perfect for birthday parties.
- A pinch of cinnamon or a splash of maple extract can turn these into fall-inspired crispy rice treats that pair perfectly with a mug of cider.
- Use vegan marshmallows and plant-based butter for a dairy-free, gelatin-free version that still keeps that gooey texture.
- Press in layers – half the mixture, then a thin layer of chocolate chips or peanut butter, then the rest of the cereal mix – for a layered dessert bar effect.
- Mix in colorful miniature marshmallows at the end for a fun pop of color and an extra burst of sweetness.
- If you want a little crunch, stir in chopped pretzels or crushed graham crackers for a twist on the classic texture.

Tips for the Best Rice Krispie Treats
Use fresh marshmallows. Seriously, they make a difference. Don’t grab that bag that’s been in your pantry for months and months thinking it will be okay since you are melting them. It won’t be okay.
Before you begin making the rice krispie treats, I recommend getting everything ready ahead of time so that you can quickly move through the recipe without scorching anything. Trust me on this, everything comes together very quickly once you get started!
The trick to pressing these easy rice krispies into your pan without sticking to your hands is to run your fingers in water, shake off the excess, and press. Voila. No sticking!
Storing and Freezing Rice Krispie Treats
Once your rice krispie treats have cooled and set (aka the longest 30 minutes of your life), they’re ready to be sliced and stored. The best way to keep them fresh is in an airtight container at room temperature. Layer sheets of wax paper or parchment between the treats if stacking, to prevent them from becoming one giant marshmallow blob.
Freezing is possible, but I’ll be real with you – it’s not my favorite option. The texture never quite comes back the same because marshmallows tend to get a little weird in the freezer. But if you must, wrap each treat individually in plastic wrap, then place them in a freezer-safe, airtight container. Freeze for up to 6 weeks, and let them thaw at room temperature before serving.
You don’t need to refrigerate these, and actually, you shouldn’t! The fridge will dry them out and make them hard – no one wants a crispy rice treat that could double as a hockey puck. Room temp is the sweet spot.
These treats are best made fresh, but you can prep them a day ahead if you’re planning for a party, potluck, or a surprise “Mom, I need a snack for school tomorrow!” moment. Just keep them tightly wrapped and stored at room temperature to lock in all that gooey goodness. They will last for up to 3 days.

These rice krispie treats are everything we love in a dessert: quick, no-bake, sweet, salty, and totally crowd-pleasing. One bite and you’ll see why they never last long around here!
More Rice Krispie Treat Recipes:
- Golden Oreo Funfetti Rice Krispy
- Rice Krispies for One
- Cookie Butter Rice Krispies Treats
- Reese’s Peanut Butter Chocolate Rice Krispies
- Milky Way Treats
- Gooey Fluffernutter Rice Krispies
- Scotcheroos (Peanut Butter Rice Krispies Bars)
Rice Krispie Treats

Ingredients
- 5 Tablespoons Butter
- 1/2 teaspoon Sea Salt, fine grain
- 10 Cups Mini Marshmallows, divided
- 1/4 teaspoon Vanilla Extract
- 6 Cups Rice Krispies Cereal
Instructions
- Spray a 9×9-inch pan with non-stick spray and line it with a foil or parchment paper sling. Spray again.
- In a very large microwave-safe bowl, or in a pot on the stove over medium heat, place your butter, salt, and 8 cups of mini marshmallows. Microwave in 30-second increments, or heat, stirring in between, until everything is completely melted and smooth.5 Tablespoons Butter, 1/2 teaspoon Sea Salt, 10 Cups Mini Marshmallows
- Add vanilla and stir again.1/4 teaspoon Vanilla Extract
- Pour in the rice krispies cereal and mix well.6 Cups Rice Krispies Cereal
- Add in the remaining marshmallows while still warm and lightly press into your prepared pan. *10 Cups Mini Marshmallows
Recipe Notes
- *Using a spoon with a little butter on it will help you press the rice krispies into the pan without it sticking all over your hands.
Nutrition
Nutrition information is automatically calculated, so should only be used as an approximation.


what is the secret ingredient?